Payment Journal Import
The Payment Journal Import add-on allows a bulk import of several payments and applications into Business Central from a regular Excel file. You can select what fields you want to import, and the add-on will put all the values in the right places – no need to follow a template!
This can be useful for organizations who enter more than 10-15 payments into Business Central weekly, as these payments and applications will now be uploaded in bulk, simply by entering them into Excel and running the import.
Users can focus on the fields that are relevant to them in their import file, without worrying about all the additional fields on the Business Central application.
The add-on will perform validations to make sure that any required fields have been entered, codes are valid, dimension values exist, etc.
Once the Excel file is ready, run the import in Business Central, select the Excel file, and that’s it! The add-on will create all the payments and applications within a few seconds.
Watch the demo:
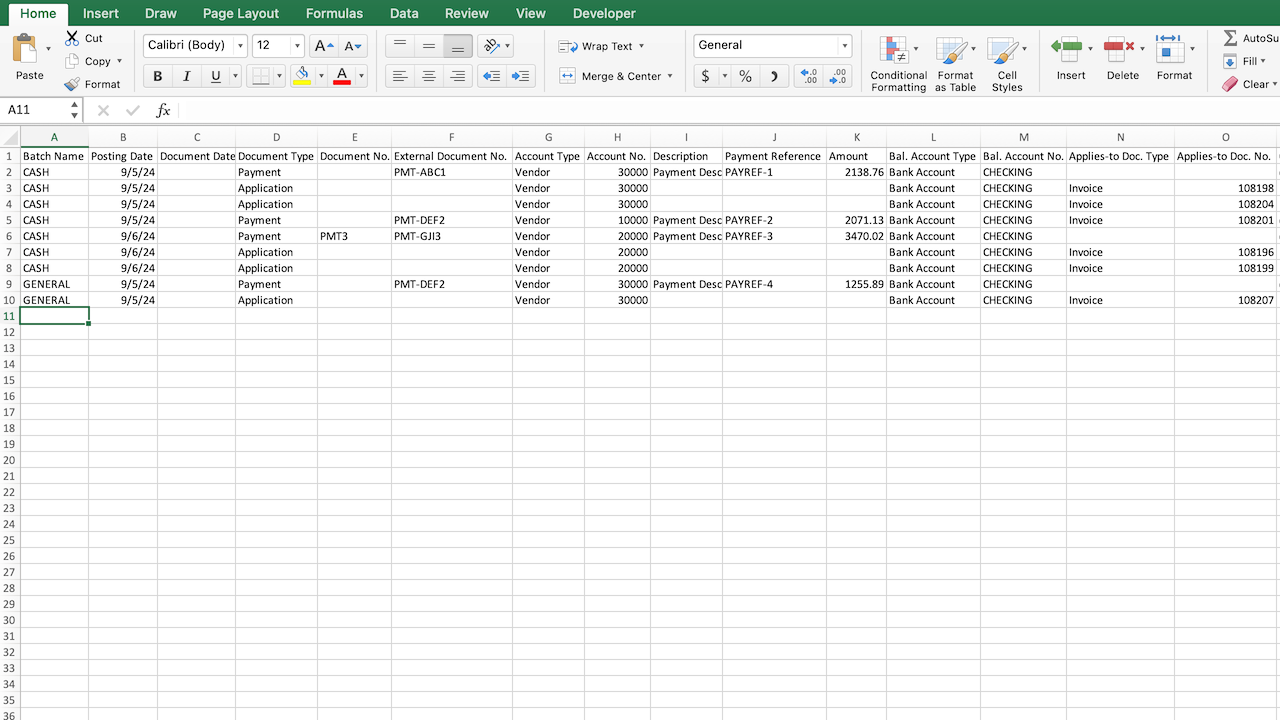
Filling in the Excel File
Lighthouse Experts Group will provide your team with a list of fields to choose from – you can then pick which Payment Journal fields you want to use in your import file.
If there is a custom field, or other non-standard field you want to use in your import – let us know!
The point is – each user decides which fields are relevant to them, which fields they want to use in their import, and they choose the ordering of the fields in their file.
This means different users can use different templates, or the same user can use different templates depending on the types of invoices they want to import. The add-on dynamically adjusts to whatever template you choose.
Running the Payment Journal Import in Business Central
Once the app has been installed, use the Search button to run the Payment Journal Import.

You will then be presented with a pop-up window that asks you to select the Excel file to import.

To do this, press on the Ellipsis button (…), select Choose…, then select the Excel file to import.
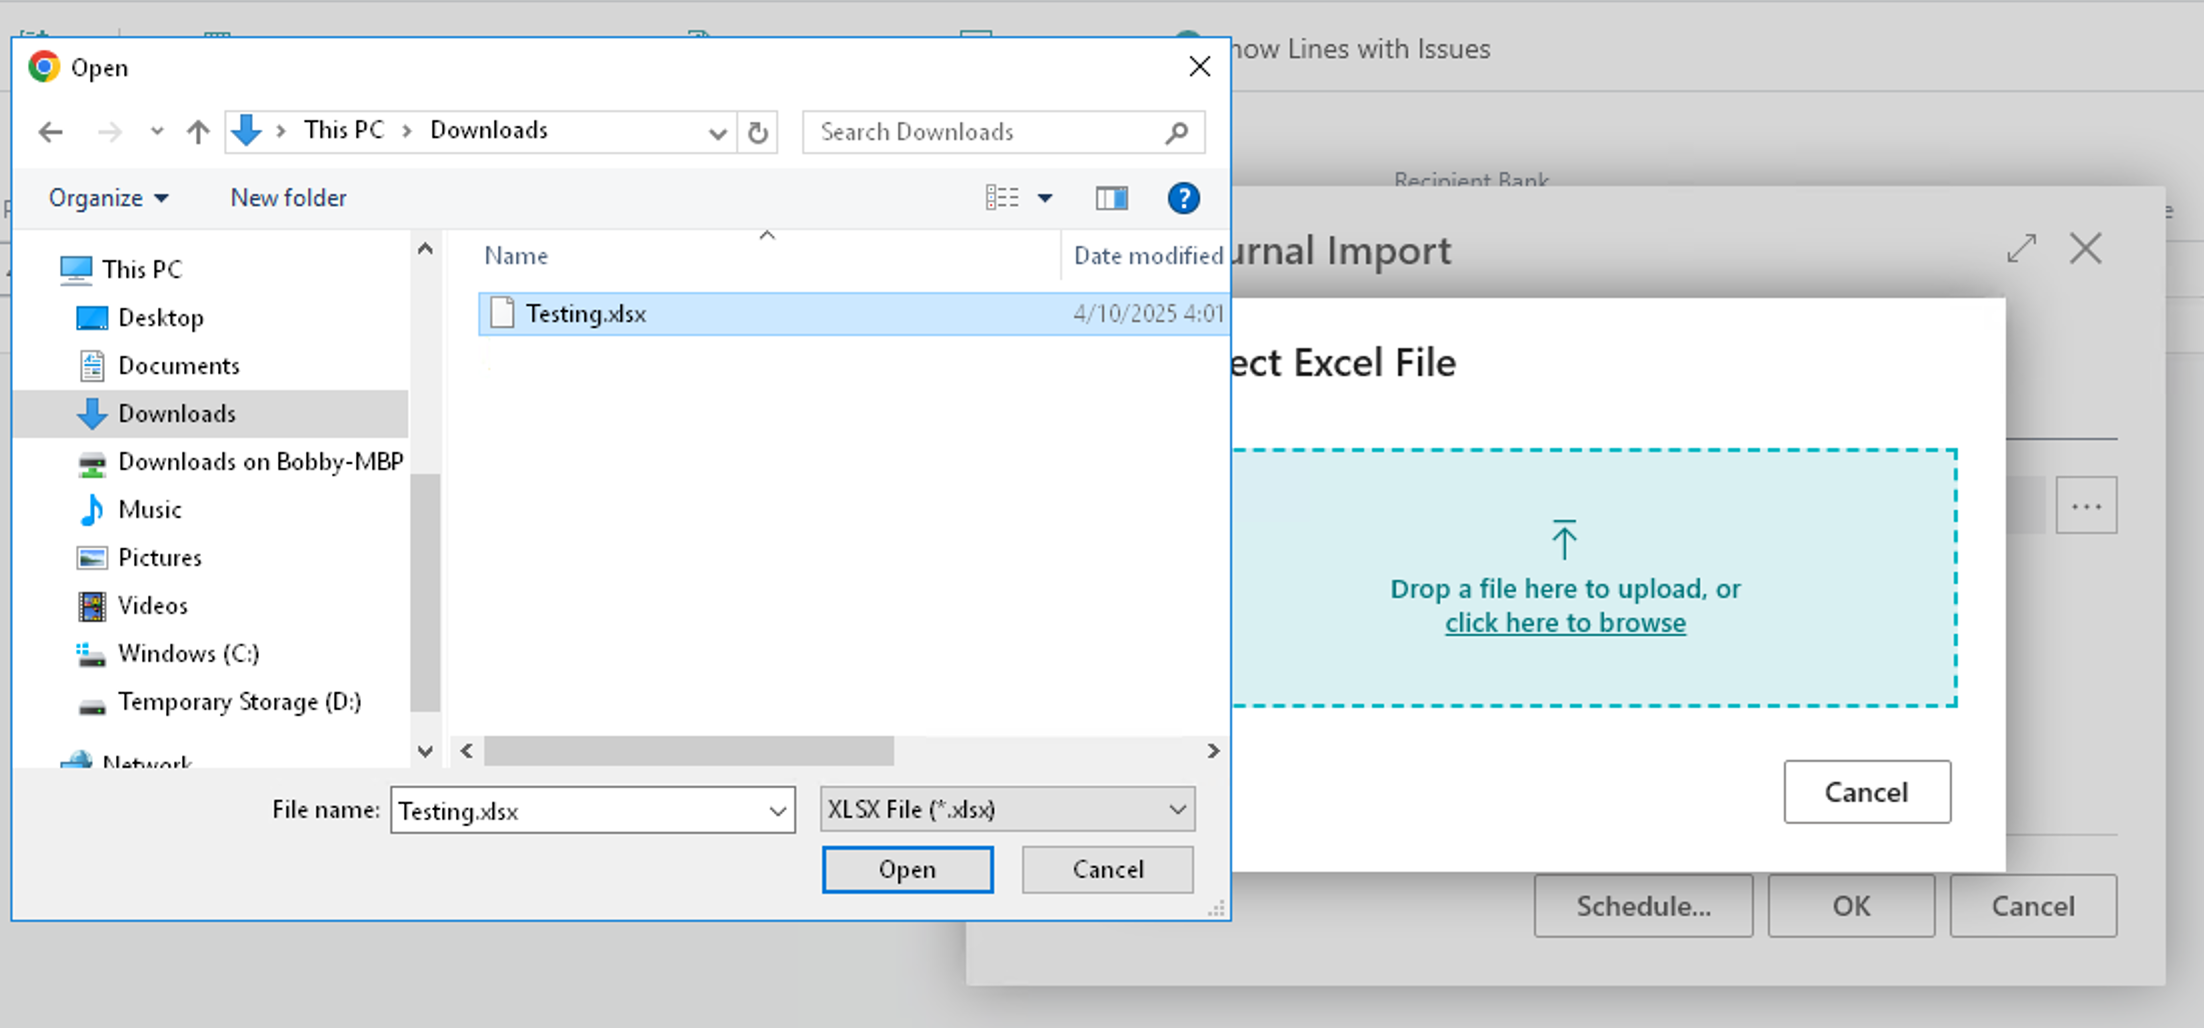
Once the file is selected, press OK.

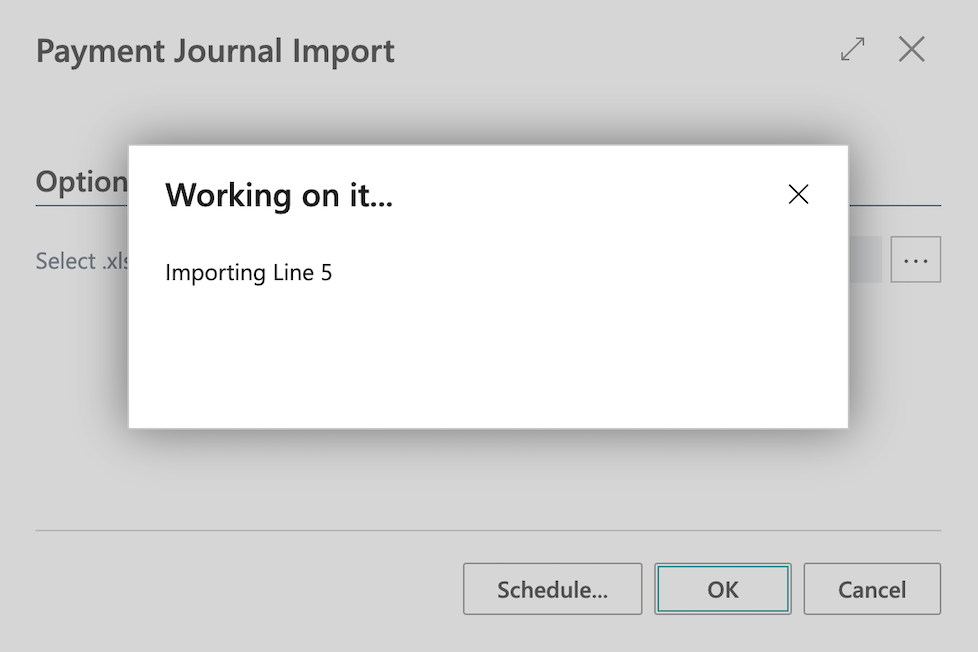
You will be presented with a progress window while the payment journal lines are being created.
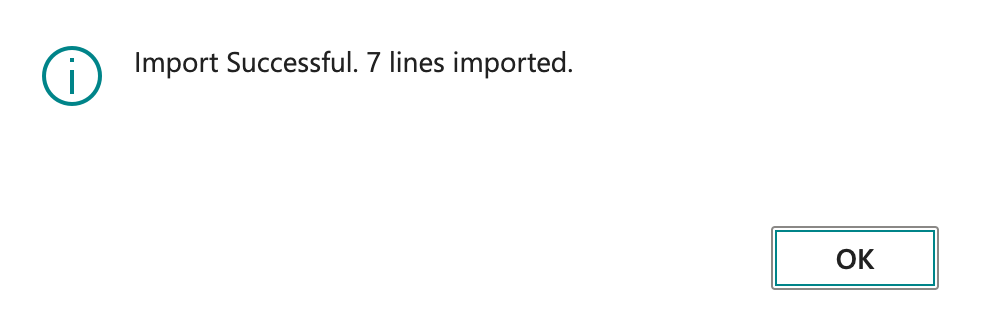
When the import is complete, the import will show a message saying Import Successful along with the number of lines that were imported from the Excel file.
You will now see the imported lines on the Payment Journals page. They are now ready for you to review, send for approval, or post.
